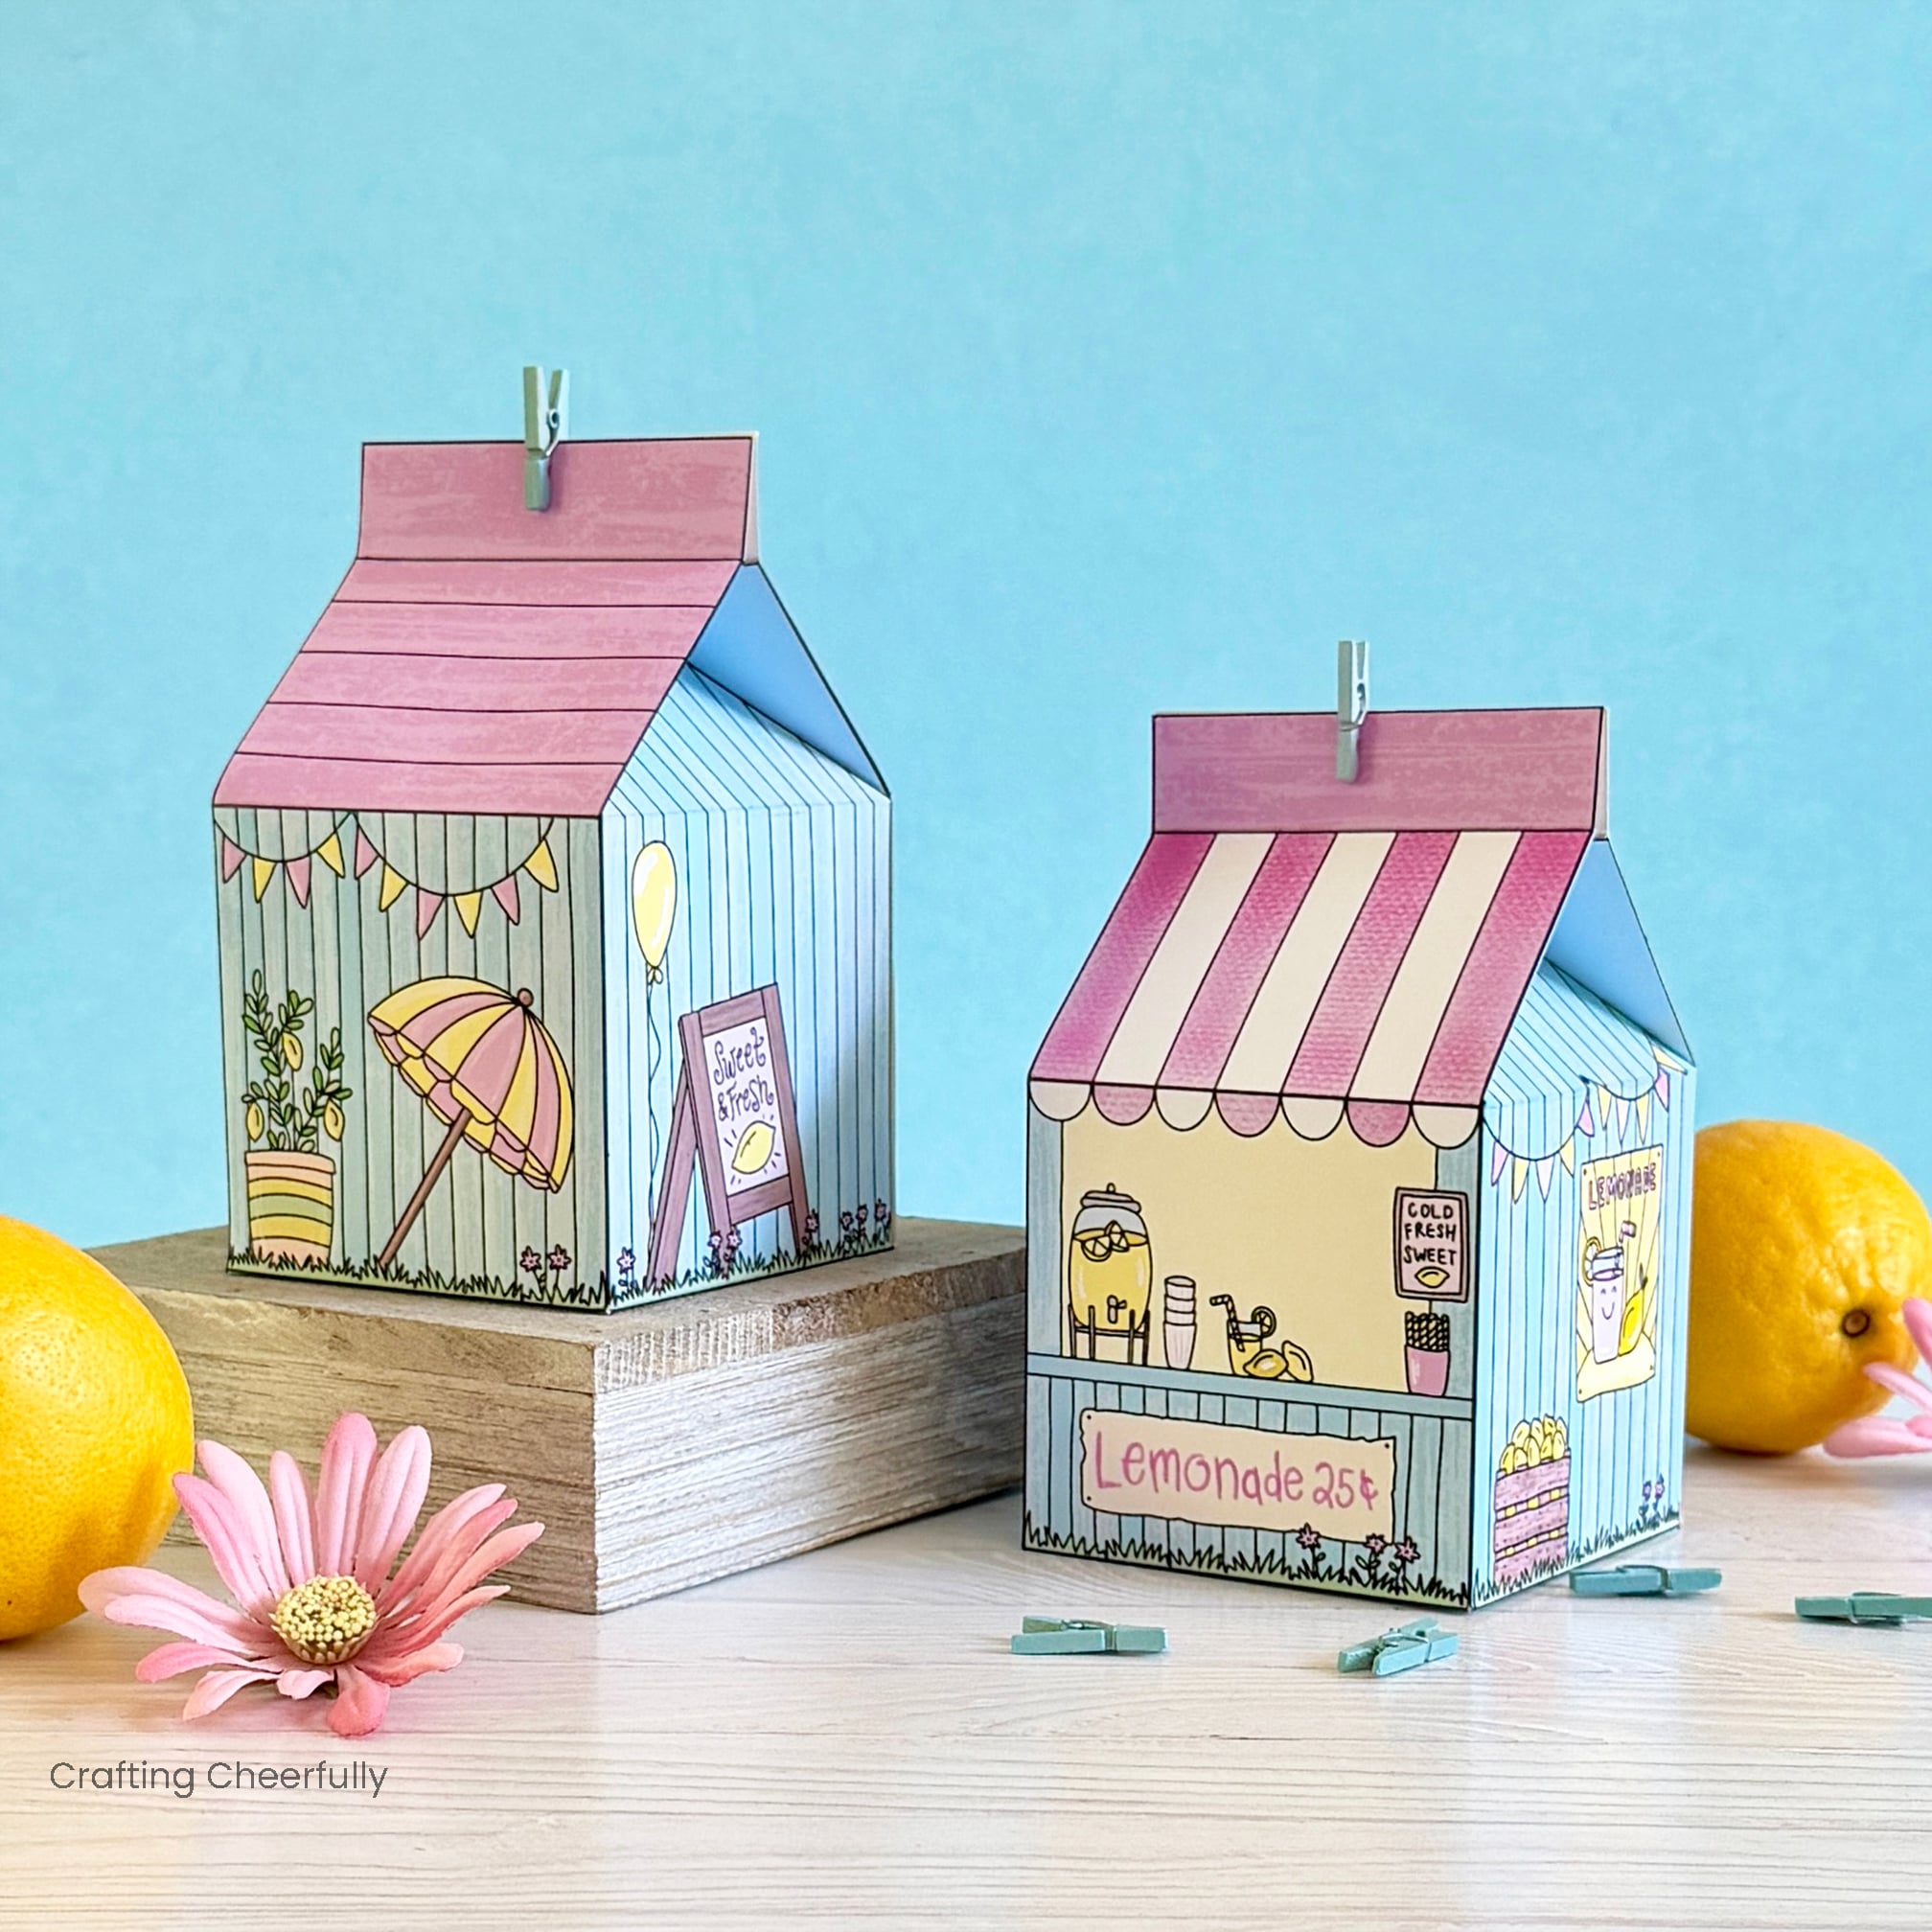
DIY Lemonade Stand Treat Box
Create a sweet lemonade stand treat box for spring and summer! A cute gift box for small gifts, treats and baked goods.
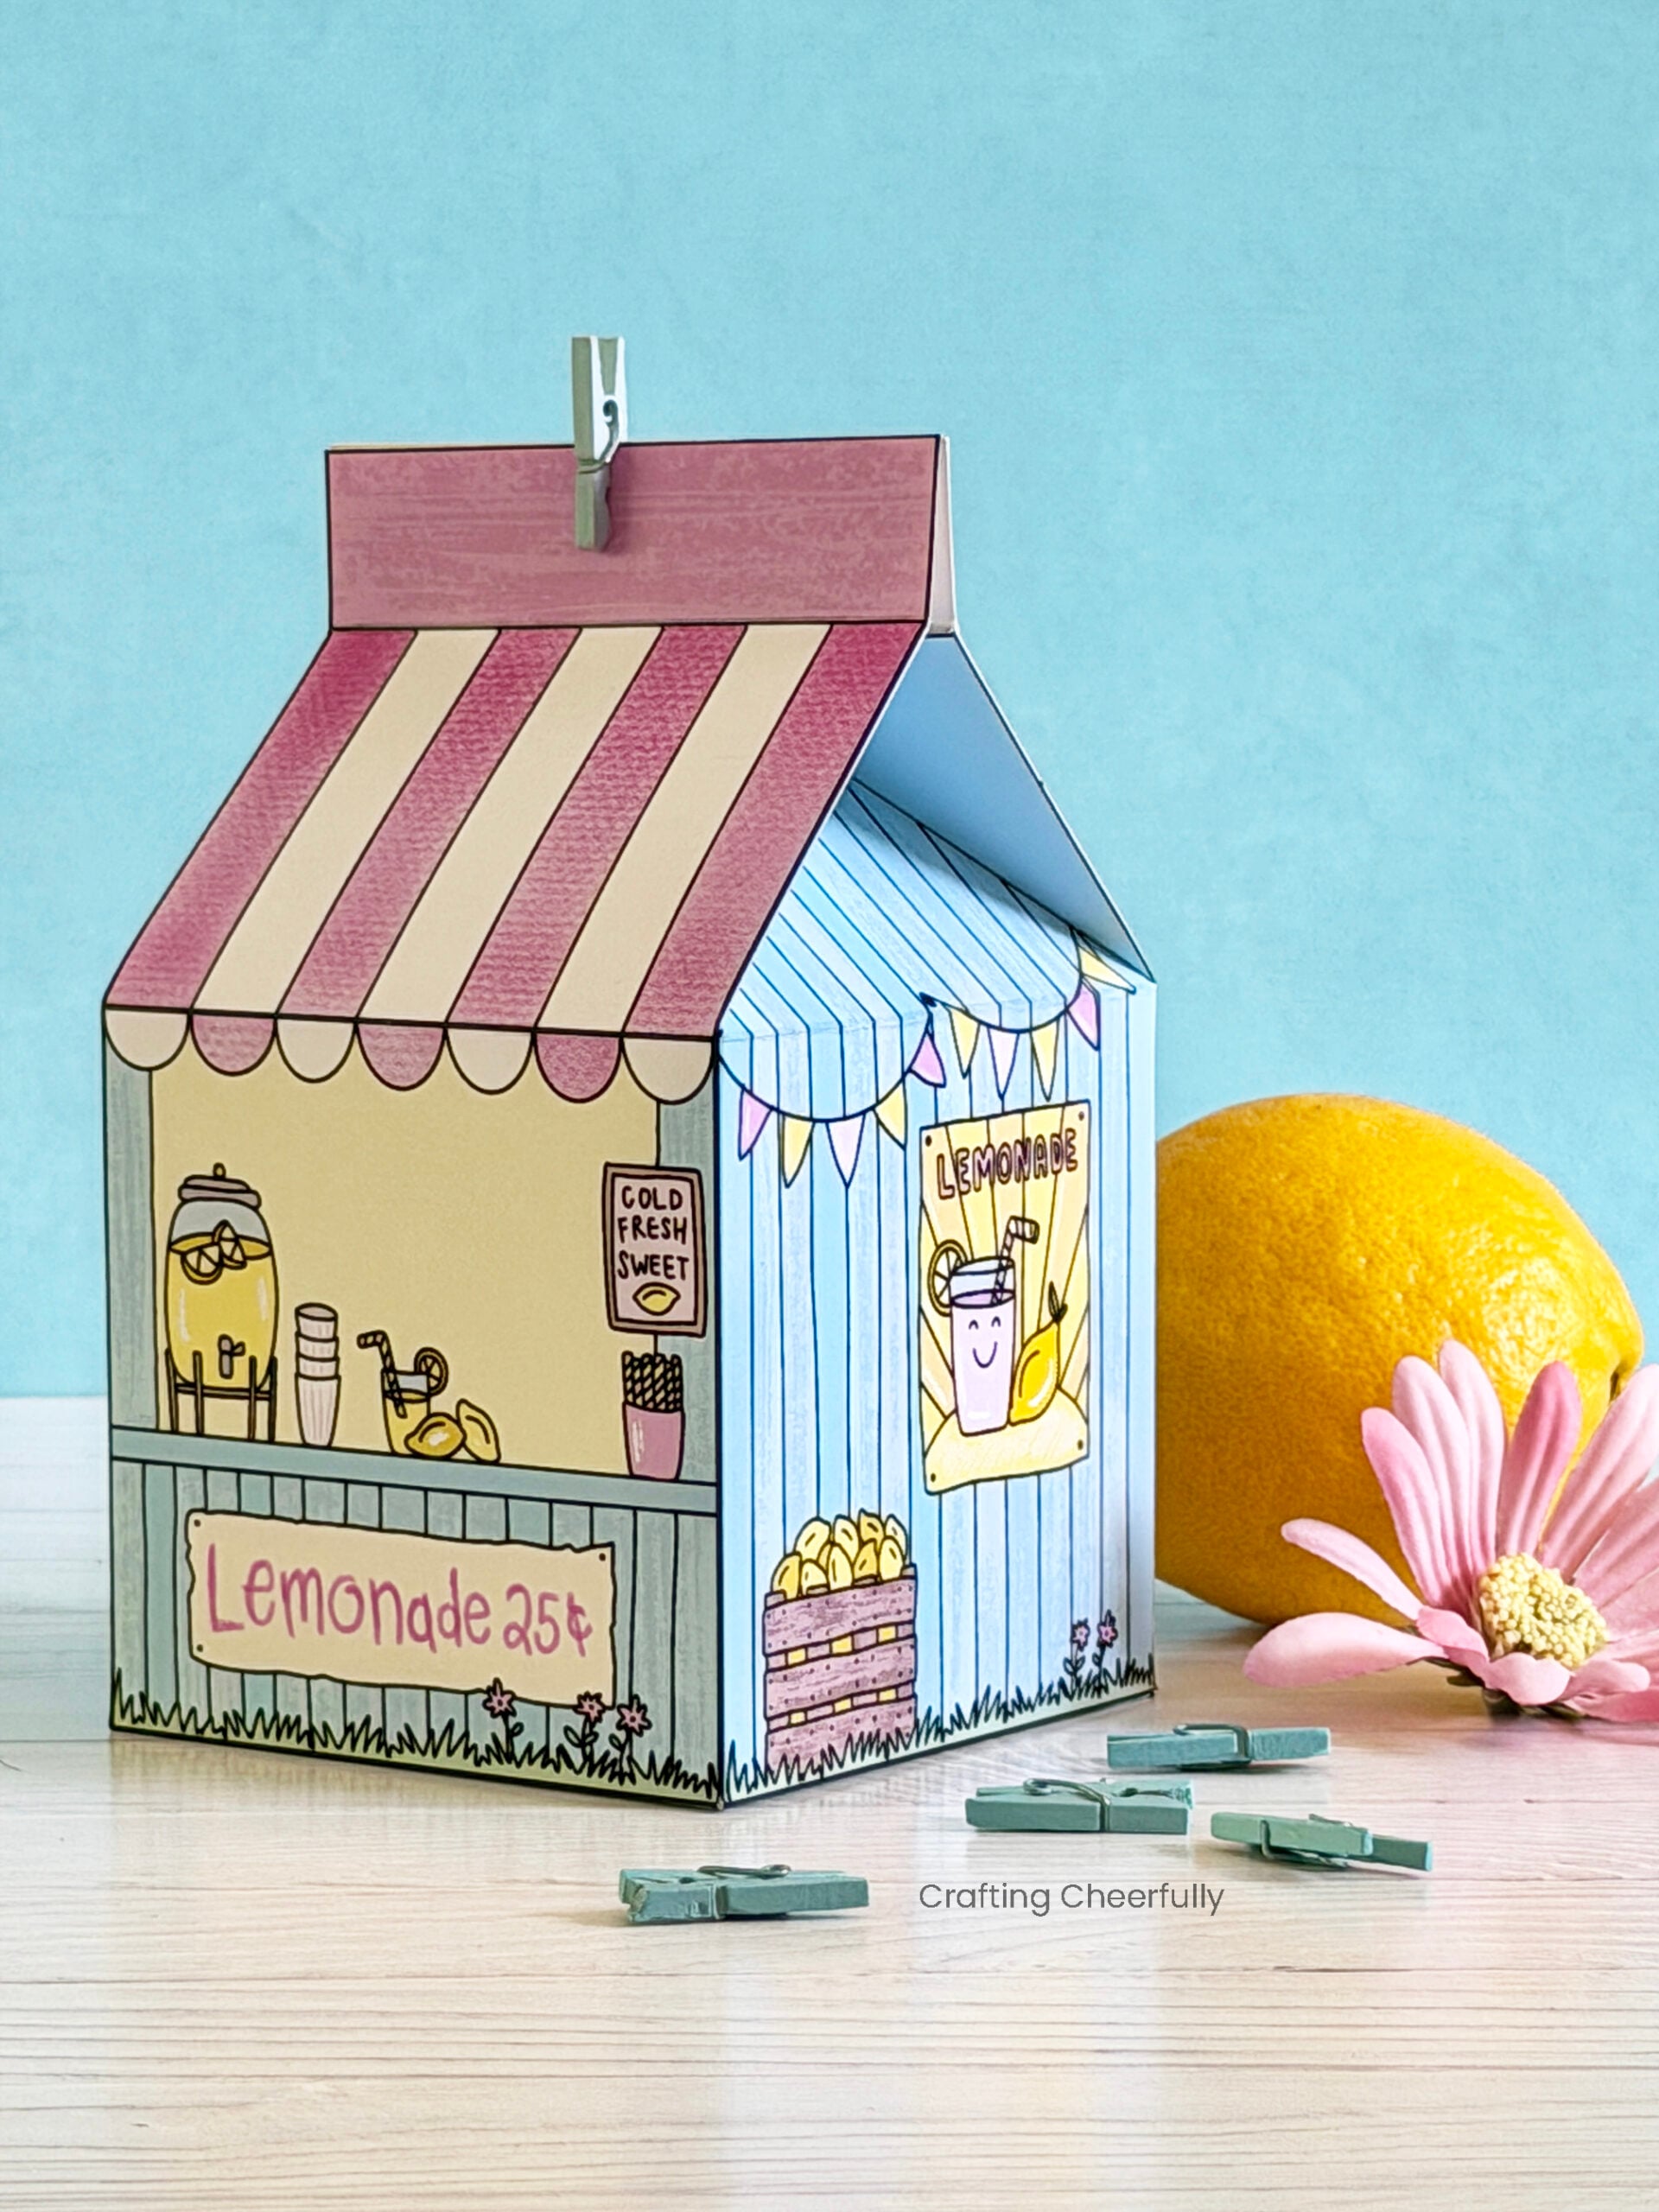
Hello Crafty Friends! Today I’m sharing a new printable treat box with you – a lemonade stand treat box! I absolutely love making treat boxes – they make really cute gifts and are great party favors. These new treat boxes have been designed to look like a lemoande stand ready to serve up refreshing classes of ice cold Lemonade!
I designed these boxes by first drawing a picture with pencil and paper. Next, I scanned the drawing into Procreate and digitally colored it before turning it into a treat box. This Lemonade Stand Treat Box joins other favorites including my Hot Cocoa Stand Treat Box, Fall Barn Treat Box, and Garden Vegetable Seed Boxes. All of these boxes started as little doodle sketches before being turned into giftable boxes!
Printable Lemonade Stand Gift Box
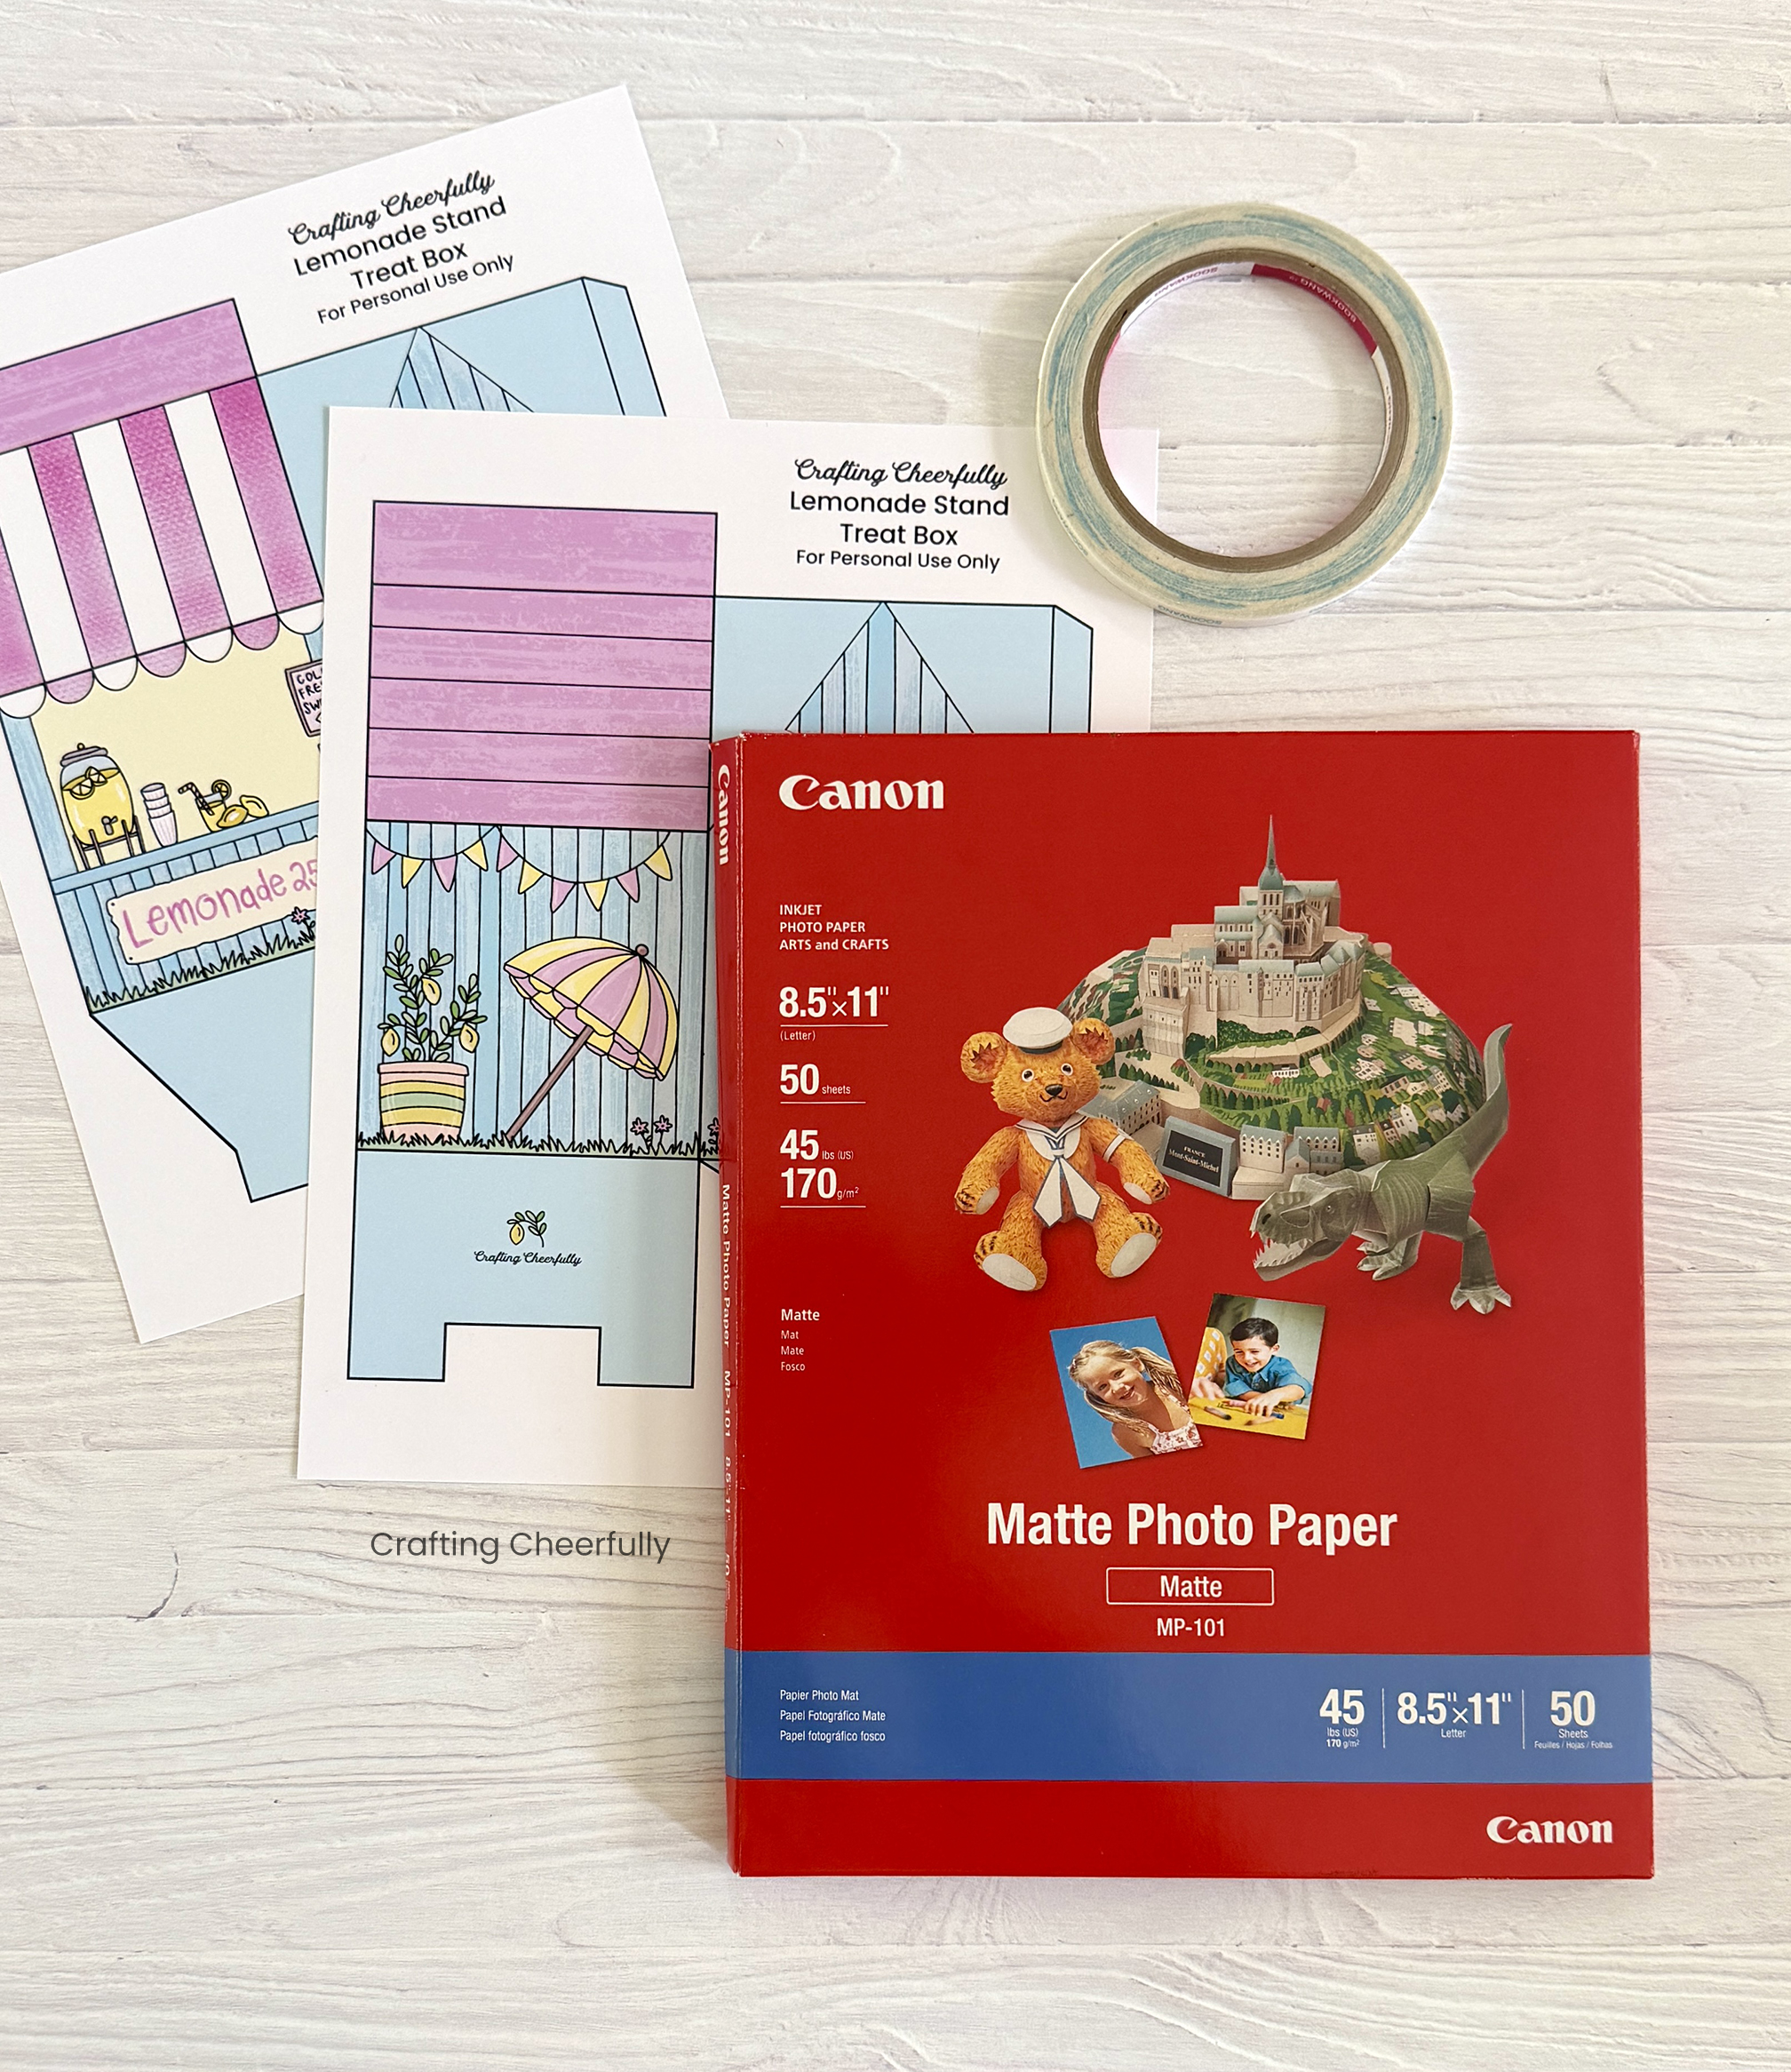
Supplies Needed:
- Printable boxes – Download for free, now through June 14th, by filling out the purple form at the end of this blog post!
- White cardstock – I used Canon Matte Photo Paper
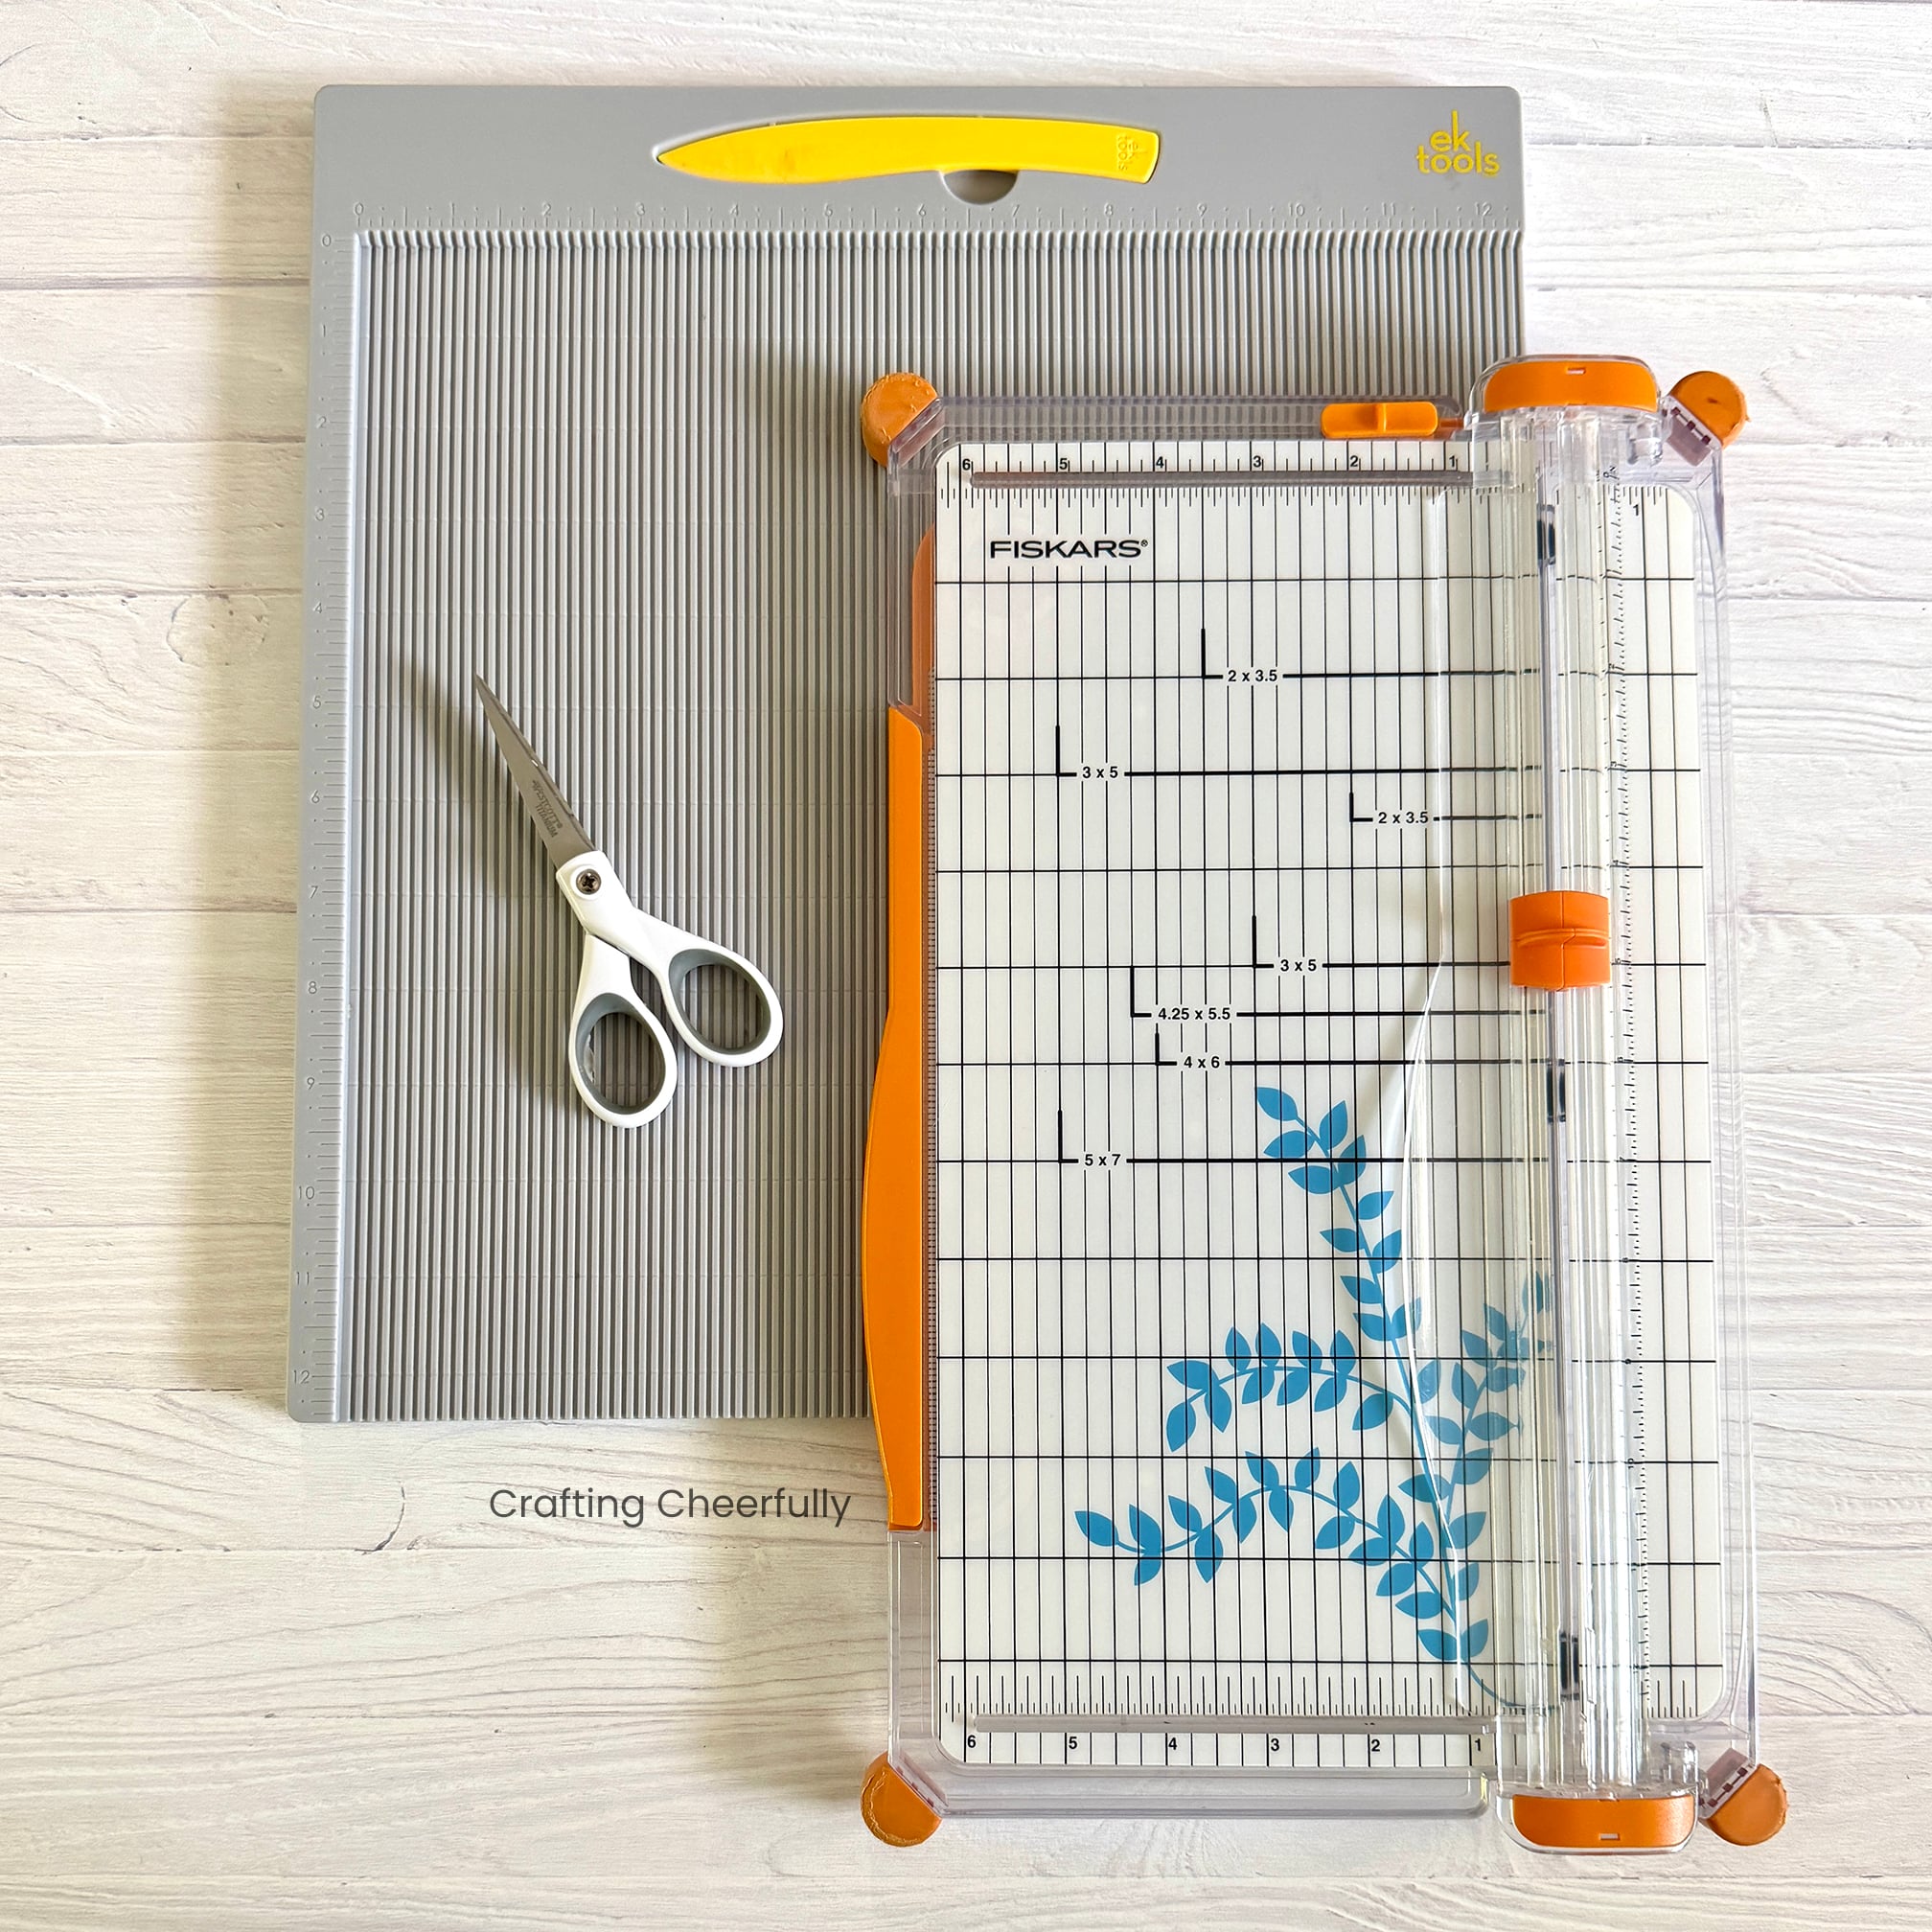
- Paper trimmer and scissors
- Scoring board
- 1/4″ Score Tape
- Small clothespins – I used little wooden ones I had on hand. These mini plastic blue clothespins are similar.
Creating the Lemonade Stand Treat Boxes
From now through June 14th, you can download the printable treat box for free and use the step-by-step tutorial in this blog post. After that, the printables will be available in my Etsy shop and come with an ad-free PDF tutorials which includes even more pictures and a scoring guide to help you create the boxes.
Cutting and Folding the Treat Boxes
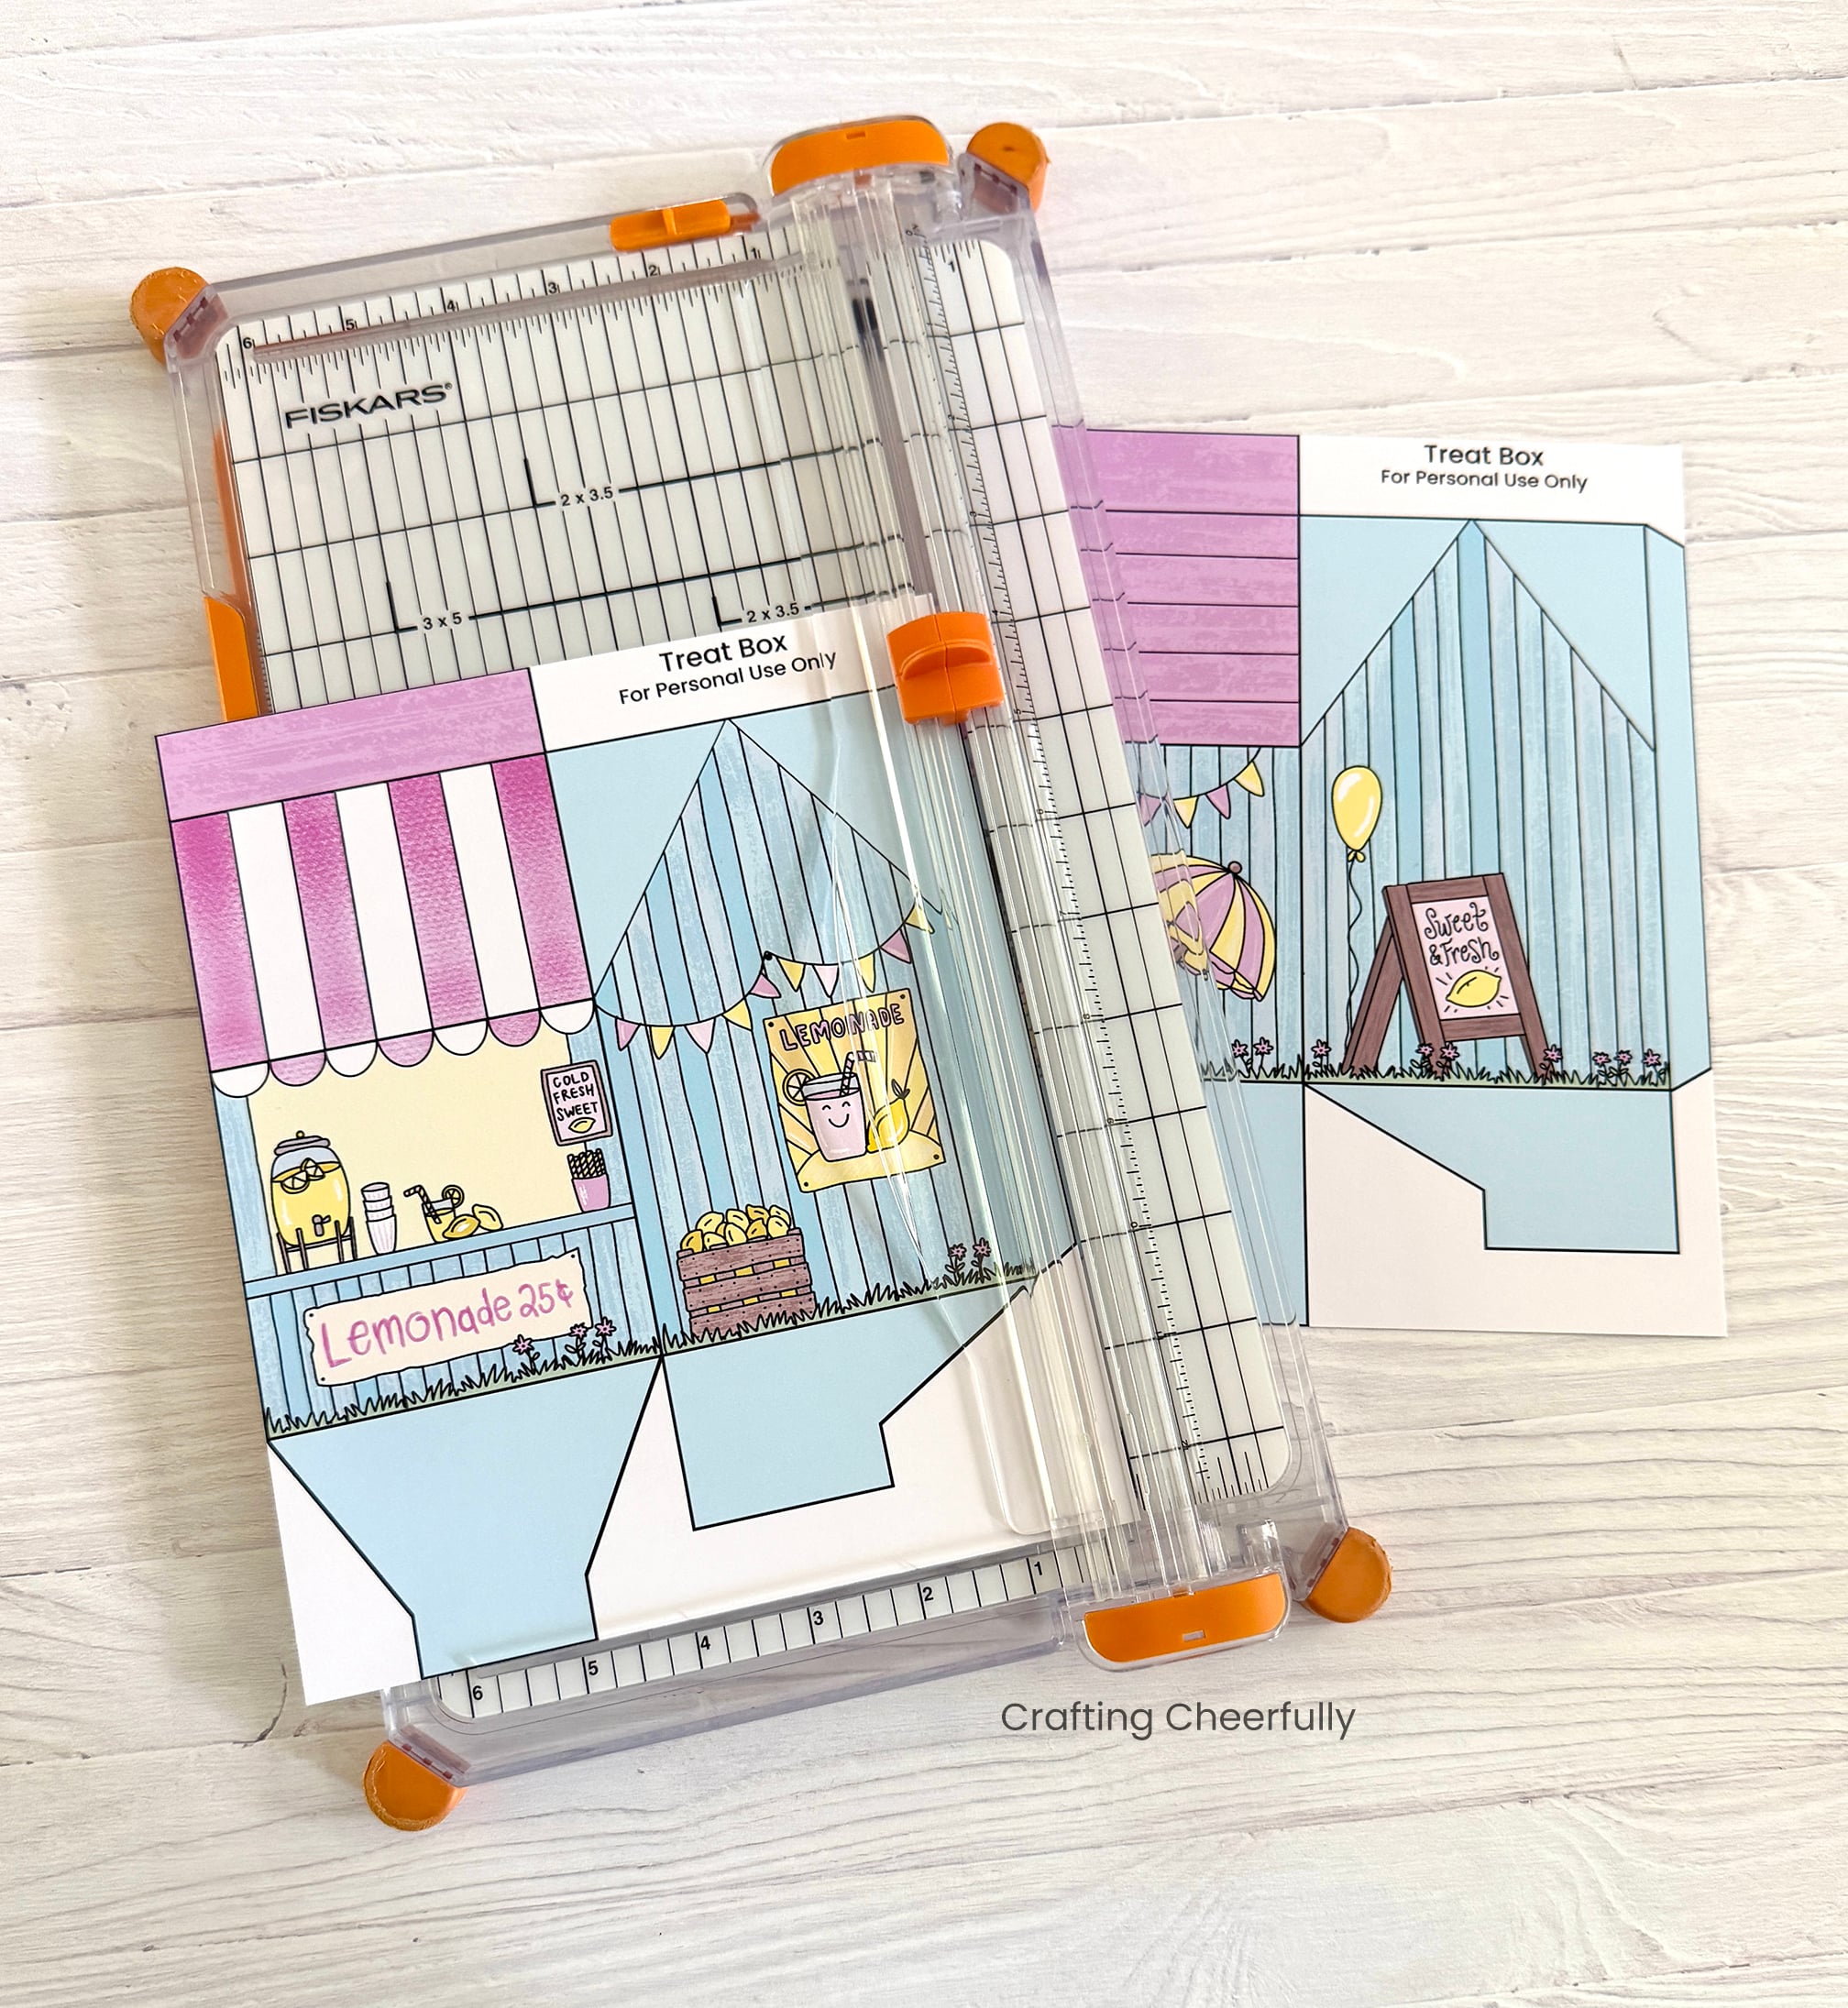
Step One: Start by downloading and printing the Lemonade Stand Treat Boxes. Cut out the box pieces using a paper trimmer and scissors.
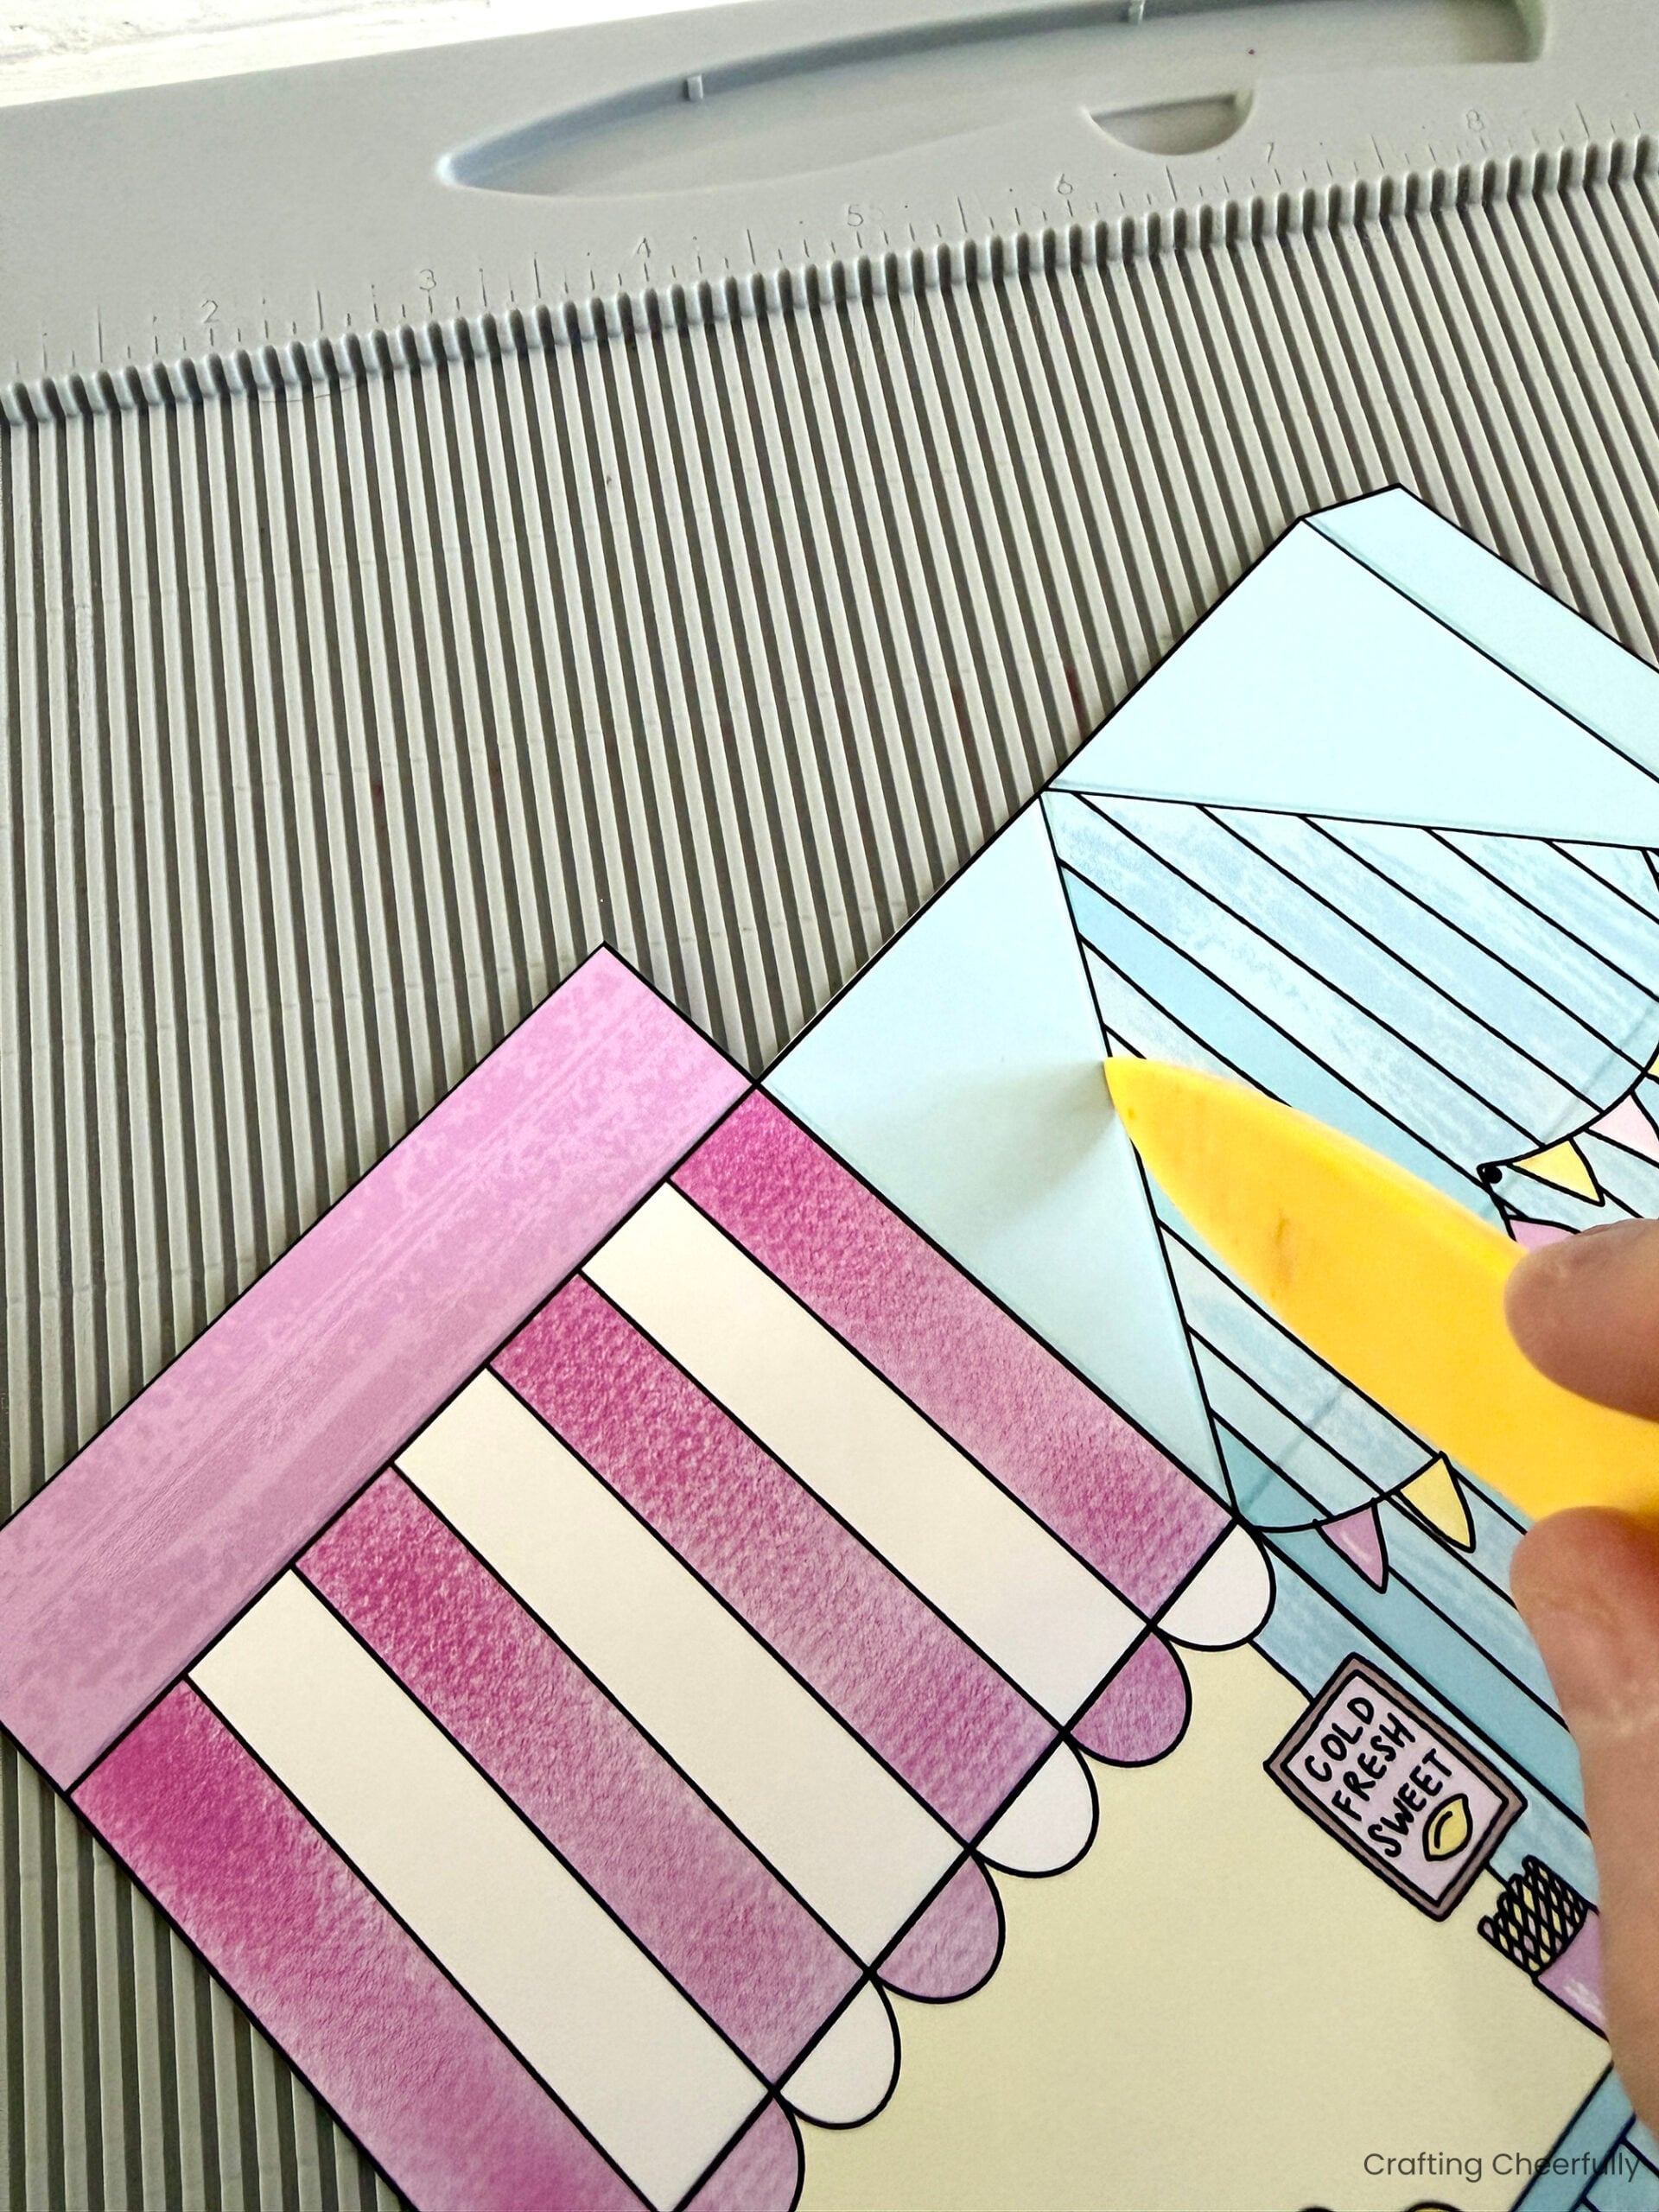
Step Two: Use a scoring board and stylus to score along the fold lines. Rotate the treat box so you can score along the diagonal lines of the roof. Next, fold along the scored lines. You can go over the folded edges with the side of the stylus to help create nice, crisp edges.
Assembling the Treat Boxes
Step Three: Apply adhesive to the two tabs to connect the treat box. I used 1/4″ Scor-tape because it is nice and strong and will hold the box together once it is filled.

Form the box by attaching the two pieces together along the tabs. Fold in the bottom of the box. The “H”-shaped piece gets folded first, then the two side flaps, and finally insert the “Y” piece into the gap.
If you plan to place something heavy in the bottom of the box, you can place a piece of cardboard or chipboard that measures just under 3.5″ x 3.5″ in the bottom of the box. This will add a lot of stability to the box and prevent the bottom from opening up.
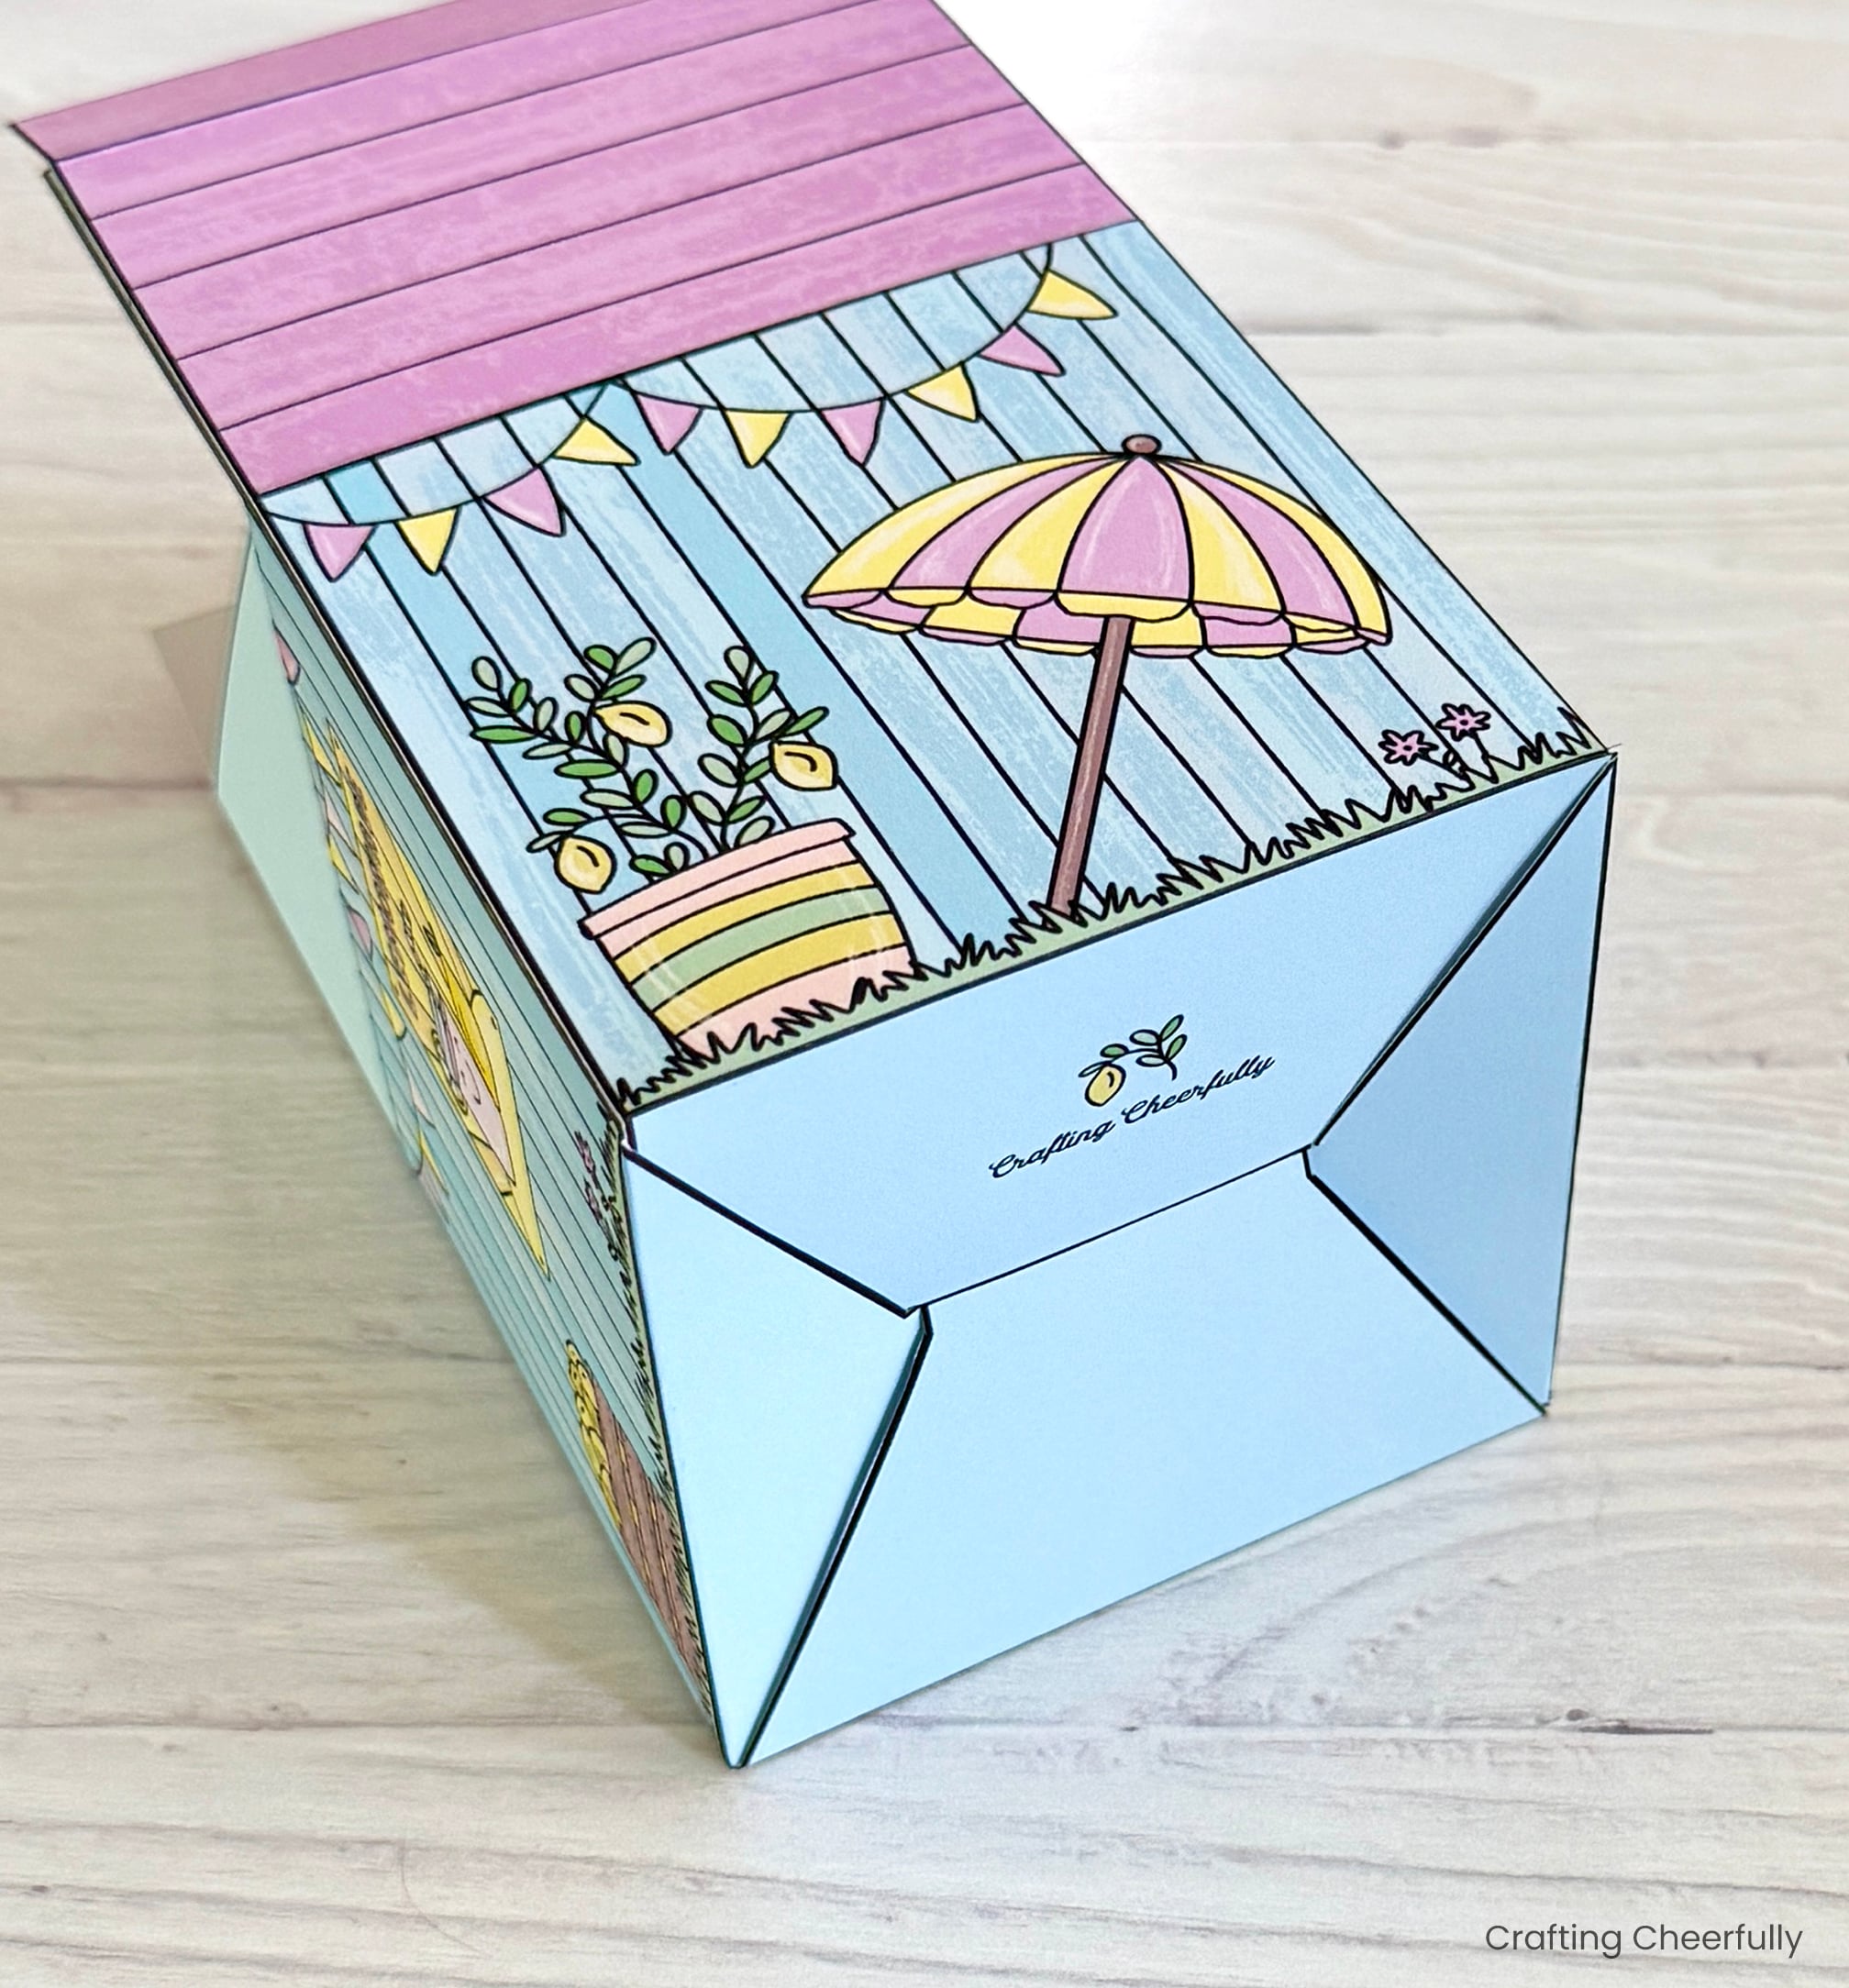
The treat box is finished! I love to close my treat boxes with a small clothespin at the top, but you can also punch holes and tie them closed with ribbon or Baker’s twine.

I hope you enjoyed this fun paper craft! From now through Sunday, June 14th you can download the treat box for free using the purple form below. After that, the printable box will be available in my Etsy shop along with a detailed, ad-free, step-by-step picture tutorial. If you love making treat boxes as much as I do, make sure to check out my DIY Treat Box Craft Page where I share fun designs for all year round!